3. Your First Step Towards a QGIS Plugin
After making the required preparations, we can start creating the plugin prototype with one of these options:
1. Develop the plugin on your own from scratch
You could start right away on the greenfield with the help of the official QGIS Developer documentation. This path might be a very good idea when you’re planning to do a complex and sophisticated plugin; this will most probably be not your case since you’re reading this article. :)
2. Fork an existing and mature QGIS plugin
I’ve personally forked Thyrsis to ease the pain of defining a solid GitLab pipeline but choose any plugin which is regularly maintained, really. PRO tip: I highly recommend QuickWKT for small-size plugins! QuickWKT uses a simplified project structure which is not covered in this series.
Recommended if you’re familiar with software development; you’ll bite your way through, eventually.
3. Create a plugin skeleton
You can create a plugin base using the QGIS Plugin Builder to skip the necessary boilerplate and get right away into plugin coding. I highly recommend this method if a) you’re new into programming and b) you know nothing about how QGIS plugins work.
This article will guide you through the third option.
Open up QGIS and install the Plugin Builder which itself is a plugin. If you’re not sure how to install plugins in QGIS, refer to the official QGIS documentation
Activate the plugin (look for the “hammer” icon in your QGIS toolbar) and either follow the Plugin Builder documentation or follow the steps I outline:
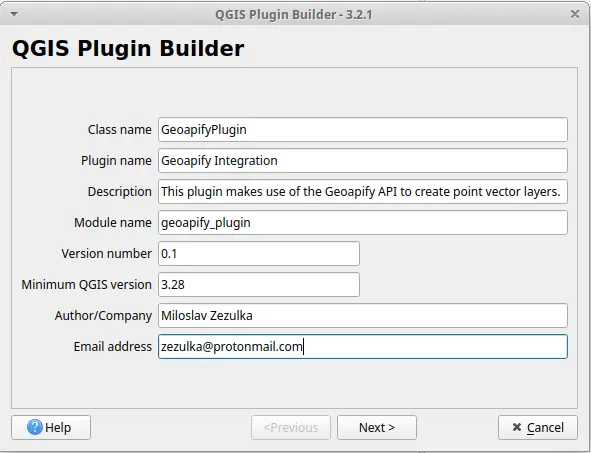
1. Create the Geoapify plugin. Notice here that you can already set the minimum QGIS version which your plugin will support.
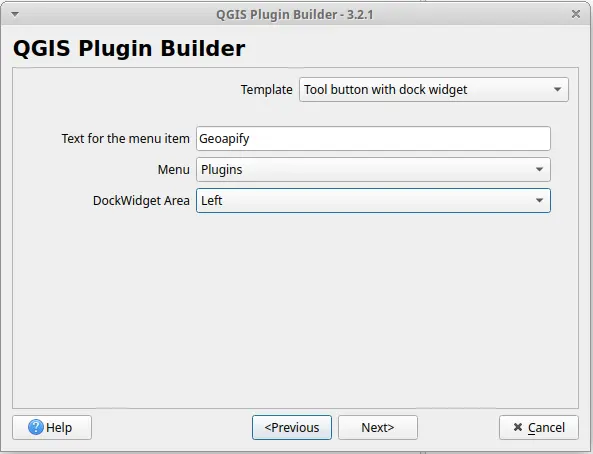
2. Specify how the plugin will be used. I’ve decided to use a tool button with a dock widget where we will show the status bar.
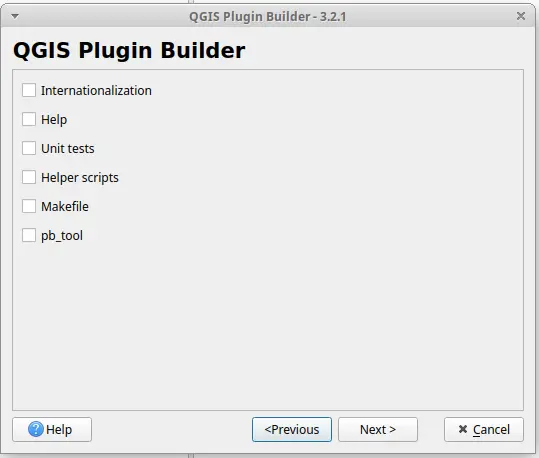
3. Make use and explore all features the Plugin Builder offers if you want to; since I’ve been using a different workflow with my main plugin, I’ve decided to skip them.
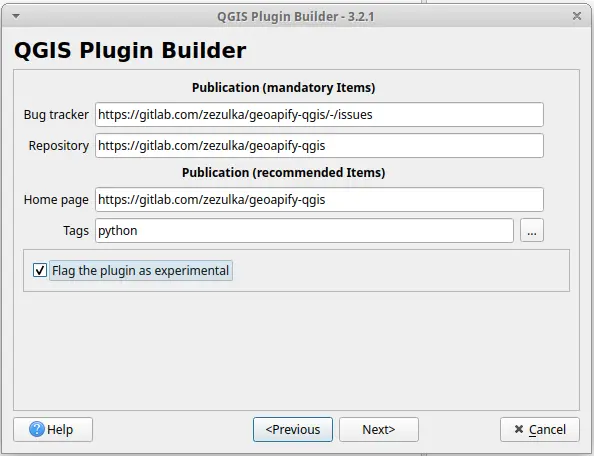
4. Finally, tell others where the plugin repository resides. I’ve also marked the plugin as experimental.
Once you’ve created the plugin template, you should have a plugin structure similar to the following:
<source root>
├── geoapify_plugin_dockwidget_base.ui
├── geoapify_plugin_dockwidget.py
├── geoapify_plugin.py
├── icon.png
├── __init__.py
├── metadata.txt
├── README.html
├── README.txt
├── resources.py
└── resources.qr
What do these files do? Let’s dissect the most important ones:
| file name | what it does |
|---|---|
| geoapify_plugin.py | This serves as the starting point for the entire plugin. run serves as the main method which gets executed by QGIS. |
| geoapify_plugin_dockwidget_base.ui | User interface which we will later load and edit in QT Designer. If you need to have more components, such as modal windows for forms, it is a common practice to create a separate ui. file for each component. |
| resources.qrc | This is an XML containing all external resources. For our purposes, we will only need a single plugin icon which will be put on top of the button in the QGIS toolbar. QT Designer knows how to work with QRC files, too, so you don’t necessarily need to edit this file manually. |
| metadata.txt | While you won’t frequently make significant changes to this file, it’s important to know that this file serves as a convenient location to specify the minimum QGIS version supported by the plugin and the version of the plugin itself. |
Next, we will create a setup configuration file named setup.cfg with the following contents:
1
2
3
4
5
6
7
8
9
10
11
12
13
14
15
16
17
18
19
20
21
22
23
24
25
26
27
28
29
30
31
32
33
34
35
36
37
38
39
40
41
42
43
44
45
46
47
48
49
50
51
52
53
54
55
56
57
58


[metadata]
description-file = README.md

[qgis-plugin-ci]
plugin_path = geoapify-qgis
project_slug = geoapify-qgis

# -- Code quality ------------------------------------
[flake8]
count = True
exclude =
    .git,
    __pycache__,
    .venv*,
    tests
ignore = E121,E123,E126,E203,E226,E24,E704,W503,W504
max-complexity = 15
max-doc-length = 130
max-line-length = 100
output-file = dev_flake8_report.txt
statistics = True
tee = True

[isort]
ensure_newline_before_comments = True
force_grid_wrap = 0
include_trailing_comma = True
line_length = 88
multi_line_output = 3
profile = black
use_parentheses = True

[tool:pytest]
addopts =
    --junitxml=build/reports/junit/test-results.xml
python_files = test_*.py
testpaths = tests

[coverage:run]
branch = True
include = *
omit =
    .venv/*
    tests/*

[coverage:report]
exclude_lines =
    if self.debug:
    pragma: no cover
    raise NotImplementedError
    if __name__ == .__main__.:

ignore_errors = True
show_missing = True
This makes sure we’re using a unified code formatting and sets up testing.
Next, we will create a few automation scripts so that the development process is as smooth and least annoying as possible. make was the first choice for me and it worked perfectly for my setup.
The first make target is going install our plugin to the local QGIS plugin repository. In the root folder of your plugin, create a Makefile with the following content:
1
2
3
4
5
6
7
8
9
10
11
12
13
14
15
16
17
18
19
20
21
22
23
24
25
26
27
28
29
30
31
32
33
34
35
36
37
38


# verify that all tools are available at the local system
REQUIRED_EXECUTABLES = make python3 flake8 docker-compose pyrcc5
EXECUTABLES_VERIFICATION_RESULT := $(foreach exec,${REQUIRED_EXECUTABLES},\
        $(if $(shell which $(exec)),some string,$(error "No $(exec) in PATH")))

SNAPSHOT_VER = snapshot
# this name should match plugin_path in metadata.txt to avoid headaches
QGIS_PLUGIN_NAME = qgisapify

PATH_TO_PROJECT = ~/git/${QGIS_PLUGIN_NAME}
PATH_TO_QGIS_PLUGINS = ~/.local/share/QGIS/QGIS3/profiles/default/python/plugins
PATH_TO_QGIS_INSTALLATION = ${PATH_TO_QGIS_PLUGINS}/${QGIS_PLUGIN_NAME}

# and now for targets themselves!
#   this will setup the default make targets, i.e. this is
#   what should happen when we execute `make` without any explicit targets
default: install-locally clean-up

install-locally: qgis-plugin
	rm -rf ${PATH_TO_QGIS_INSTALLATION}
	unzip -q -o ${QGIS_PLUGIN_NAME}.${SNAPSHOT_VER} -d ${PATH_TO_QGIS_PLUGINS}

qgis-plugin:
	# qgis-plugin-ci ignores files outside of version control ¯\_(ツ)_/¯
	git add .
	qgis-plugin-ci package ${SNAPSHOT_VER} --allow-uncommitted-changes

# qgis-plugin-ci creates auxiliary files we really don't want
#   versioned in our repository, let's also automatically delete them
#   once the plugin is installed
clean-up:
	find . -name "*.pyc" -o -name "Ui_.*" -o -name "resources_*.py" -exec rm \{\} \;
	rm  ${QGIS_PLUGIN_NAME}.${SNAPSHOT_VER}.zip
	rm -rf venv-unit-tests
Finally, we’ll need to reorganize our project structure a bit so that it is compatible with the qgis-plugin-ci toolkit which handles all the necessary QGIS plugin “plumbing” for us. The only files which will be left at the root folder are README.txt, setup.cfg and the Makefile we’ve just created. The rest of files will go into plugin source directory which should be named exactly like your plugin. In my case, I created qgisapify as a direct subfolder of the root directory.
In summary, this should be your project structure now:
1
2
3
4
5
6
7
8
9
10
11
12
13
14
15
16

<source root>
├── Makefile
├── qgisapify
│   ├── geoapify_plugin_dockwidget_base.ui
│   ├── geoapify_plugin_dockwidget.py
│   ├── geoapify_plugin.py
│   ├── icon.png
│   ├── __init__.py
│   ├── metadata.txt
│   ├── resources.py
│   └── resources.qrc
├── README.txt
└── setup.cfg
We’re now all set up! Let’s run make in the root folder to see what happens:
1
2
3
4
5
6
7
8
9
10
11
12
13

$ make
$ qgis-plugin-ci package snapshot --allow-uncommitted-changes
  2024-01-27 15:27:03||WARNING||changelog||Changelog file doesn't exist: ~/git/qgisapify/CHANGELOG.md
  2024-01-27 15:27:03||WARNING||changelog||Changelog file doesn't exist: ~/git/qgisapify/CHANGELOG.md
$ pyrcc5 -o ~/git/qgisapify/qgisapify/resources_rc.py /home/mzezulka/git/qgisapify/qgisapify/resources.qrc
  Plugin archive created: qgisapify.snapshot.zip (11.55 Ko)
$ rm -rf ~/.local/share/QGIS/QGIS3/profiles/default/python/plugins/qgisapify
$ unzip -q -o qgisapify.snapshot -d ~/.local/share/QGIS/QGIS3/profiles/default/python/plugins
$ find . -name "*.pyc" -o -name "Ui_.*" -o -name "resources_*.py" -exec rm \{\} \;
$ rm  qgisapify.snapshot.zip
$ rm -rf venv-unit-tests
Notice that the qgis-plugin-ci toolkit complains that we’re missing a CHANGELOG.md; we’ll get to what this means later. Other than that, we can see that the ZIP of our plugin was extracted to the QGIS repository which means that our plugin will be available in QGIS! Let’s start QGIS and enable the plugin:
 The first Geoapify Integration plugin draft in action.
The next task ahead of us is to implement an HTTP client which will communicate with the Geoapify API. As implied before, this part will be skipped in this series.
Next, we will focus on how to interact with PyQT, which is the core framework for all Python QGIS plugins.
