1. Plan Your Work
So you’ve decided to implement a functionality in QGIS which hasn’t been already covered by a plethora of QGIS plugins already available. Or perhaps the functionality does exist but you wish to extend it or add your own flavour to it if you’re fortunate enough that the plugin is publicly available.
One way or another, welcome on board!
Before we start showcasing how one would go about developing a QGIS plugin in Python, I always like to start out with a plan. I’ve been a professional software developer for quite some time now, so planning my coding work is natural for me. If you’re developing a plugin in your free time or just for fun, work planning might not be your first instinct. However, having a roadmap in your mind is a great practice to avoid losing track of your goals. Even the simplest projects benefit from a straightforward checklist!
You could make use of any external list-making application of your choice but I highly recommend a tool which smoothly integrates with your code repository. Features like automatic issue management based on your feature branches (more on that later) can be incredibly useful.
I’m going to demonstrate how to manage your work in Gitlab since that’s where my plugin repositories reside and that’s what I’m most familiar with. In this series, we’re going to build a very simplistic (yet hopefully comprehensive) plugin which will integrate the address, location and POI search of the Geoapify API.
We will develop a simple QGIS toolbar to create a point vector layer using a text-based location search. To get started quickly, you can fork the refential repository and modify it to your needs; it is highly advisable, though, to understand the plugin project structure, so consult the official PyQGIS Developer Documentation for more tips and insights.
Once we’ve created a Gitlab repository skeleton, let’s plan our work first:
- we will need to create a basic plugin structure so that QGIS knows how to inject your Python code into its runtime - all the QGIS plugin installation does is that it copies all plugin code locally into its internal plugin directory and executes mainPlugin.py
- if your plugin has multiple functionalities, consider a proper user interface design; the tool which has helped me considerably was QT Designer; you can inject QT components programatically into QGIS using the PyQT library but that’s a viable way during plugin prototyping and/or if you’re 100 % sure your plugin is going to be very small we need to connect to our external data source, in this case Geoapify; while this won’t be covered in this series, numerous well-written tutorials are available on the Internet
- once we’re done with the necessary plumbing and boilerplate, we will need to connect our Geoapify client to user interactions; in our case, we would like to display a point on top of the underlying raster map, based on the user input (address, location, …)
- conclude by writing a plugin documentation; in practice, this should be done simultaneously when you write the code - that’s when you understand the inner workings of the plugin the best :)
- optionally, you can also implement a plugin release process which publishes your code to the public plugin repository so that you can easily share it with others
When you create a TODO list of your work, make sure the tasks are as specific and isolated as possible. Steer clear of creating huge and ambiguous tasks such as “create a point in a vector layer based on user’s input” because developing your plugin in small increments is what will get you to the goal the fastest way. The other benefit of doing things in small chunks is motivation - it is much better to work on task “create a toolbar in QT designer which will enable user to input address” than “implement a new cool QGIS plugin”. :)
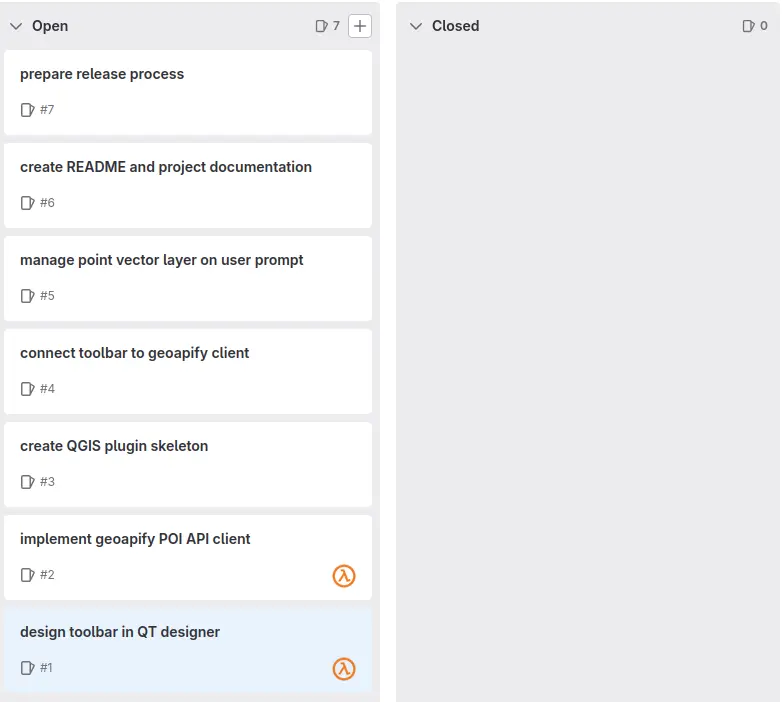
Here is what my plan looks like:
 Development board for plugin created on Gitlab. At this stage, I haven’t written a single line of code.
Gitlab automatically assigns each issue a unique ID and referencing this ID in your commit message can automatically close the issue once your work is merged into the main branch. I highly recommend creating a TODO list like this before diving into code, even if you’re working on your own.
In the next part, we will install the necessary software and tools so that we can start our work.